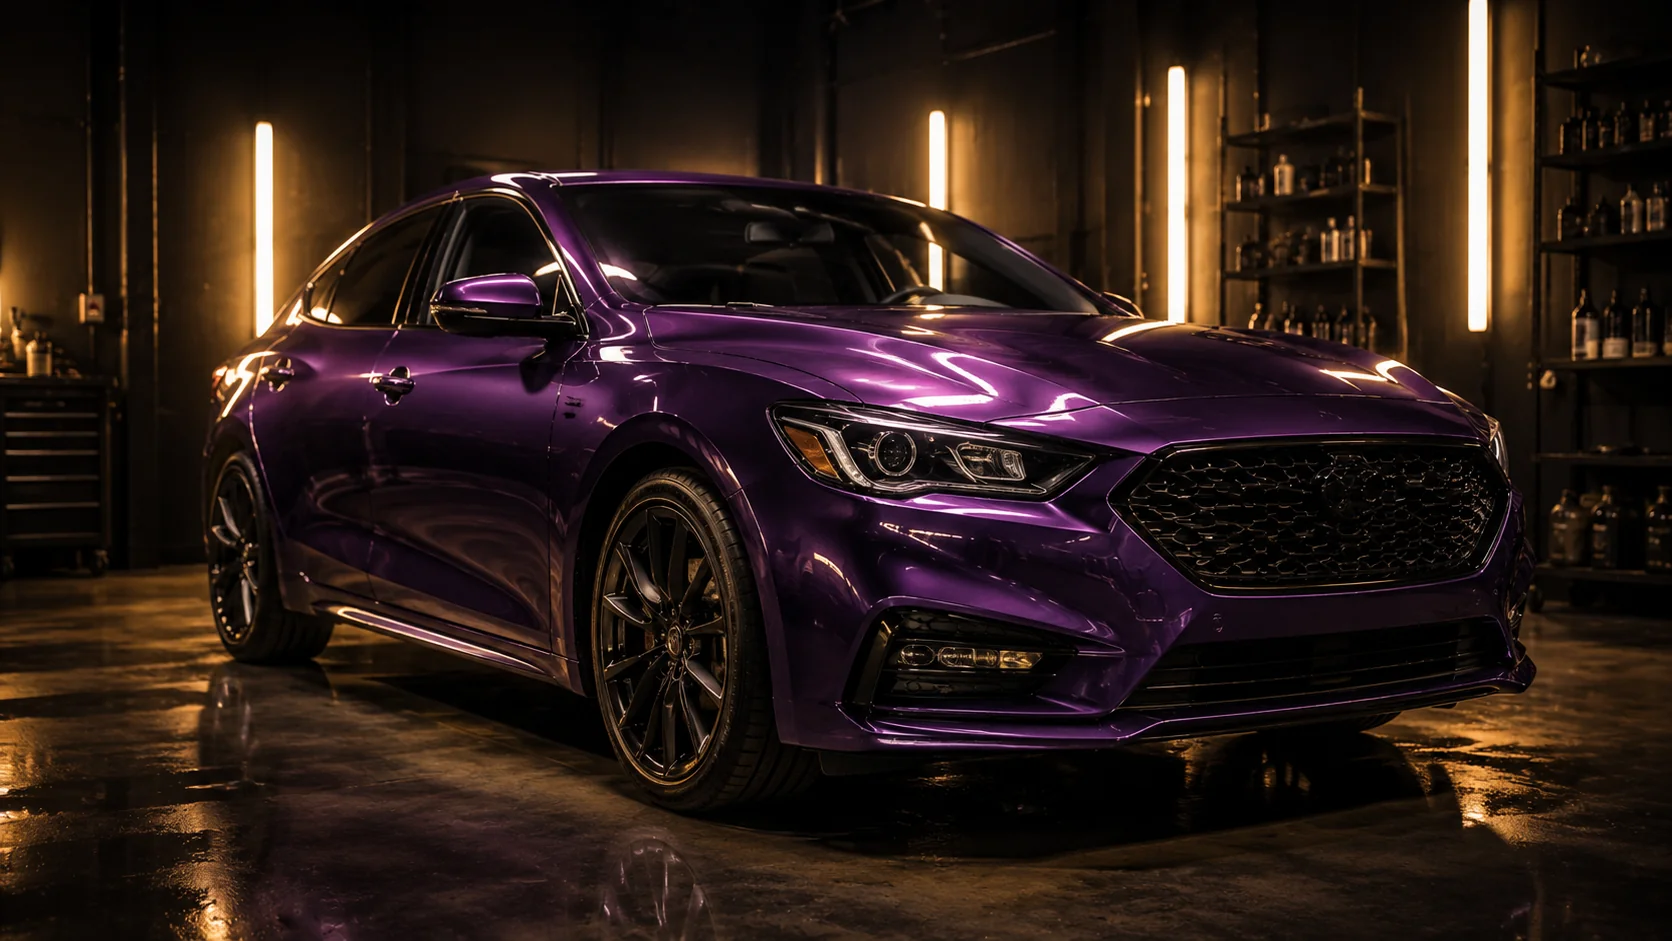


A colour change is one of the most spectacular jobs that come to a paint shop. This time the customer wanted to move away from factory black to a deep purple with a pearl sheen. We show how the transformation unfolded — step by step.
The starting point
The car arrived in good mechanical condition but with paint showing its age — small scratches, dull spots, and a few chips. The customer wanted not just a new colour but a “showroom” finish.
A colour change is more than just new paint
It’s a full process covering disassembly, prep, and painting even in places you don’t see at first glance — inside door cavities and under lids.
Body preparation
The most important and time-consuming stage:
- removing handles, trims, lights, and seals
- thoroughly sanding the entire surface
- repairing minor damage and filling
- masking and degreasing before painting
There are no shortcuts here
Skipping any prep step ends in chips or an uneven colour. These 70% of the work decide the final result.
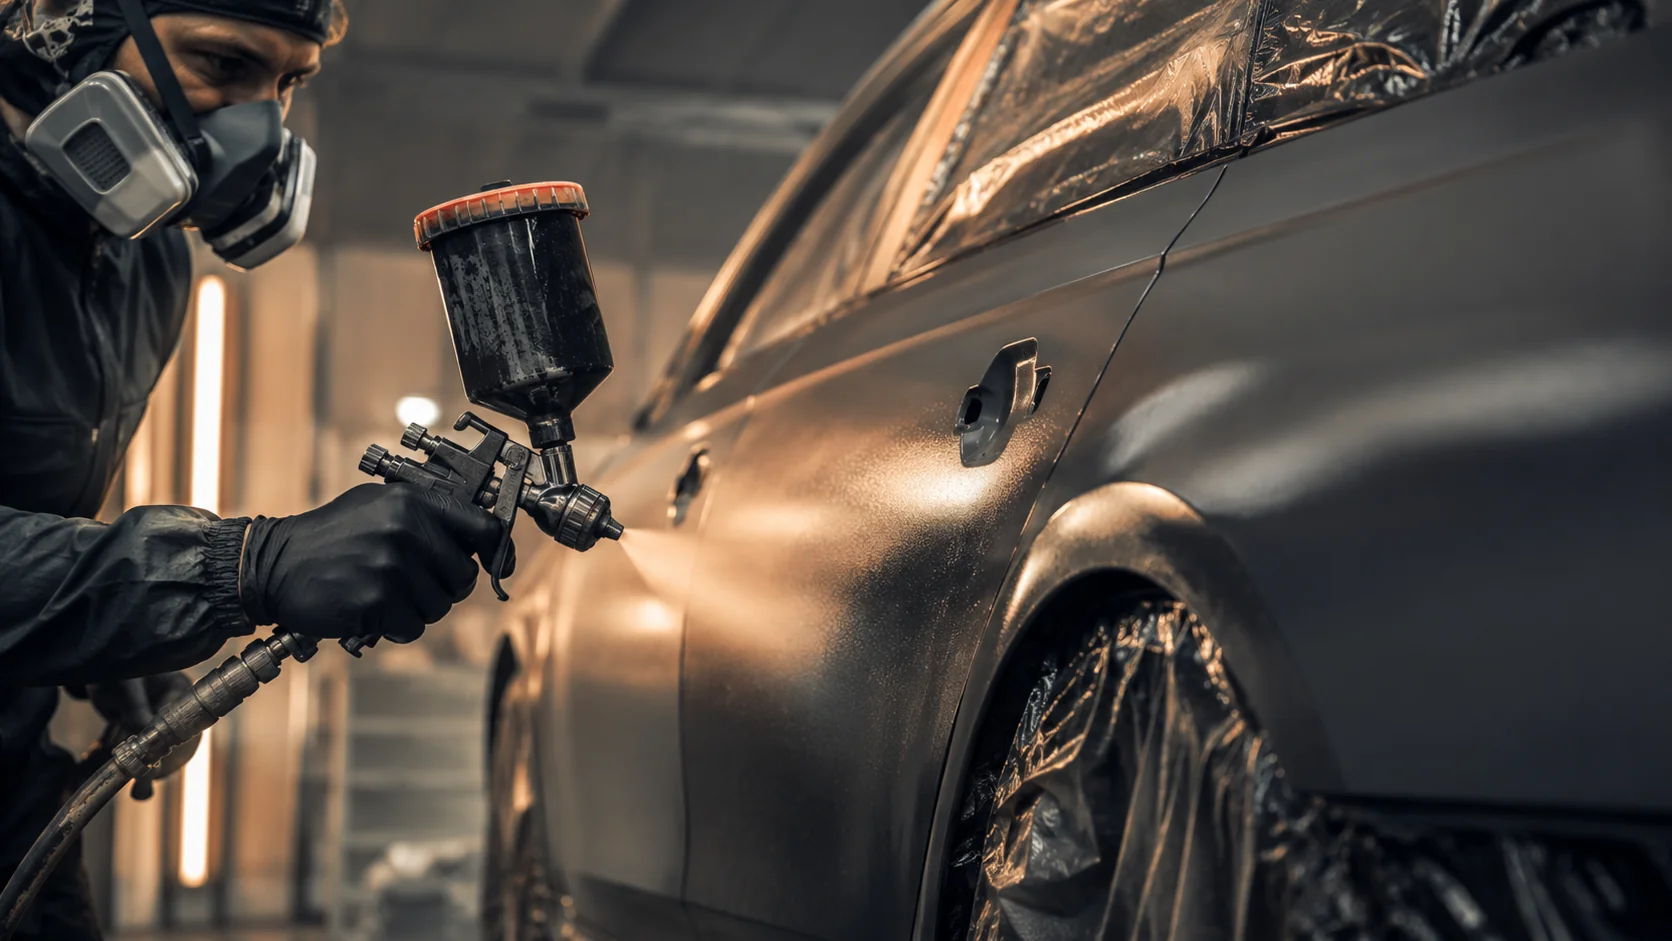
Applying the colour
We applied the pearl purple in layers, checking shade uniformity under different angles of light. Then a clear coat sealed the surface, adding depth and protecting the colour.
Depth through layering
The pearl pigment makes the colour shift saturation depending on the light — the car looks different in sun and shade.
The final result
After reassembly and polishing, the car left the shop in a completely new guise — deep purple with a pearl reflection and mirror shine. The customer got a vehicle that stands out on the road and looks fresh from the showroom.

Dreaming of changing your car’s colour?
We’ll advise on the shade and finish, then do it properly — from prep to polishing.